How to Add Your Templates to the Marketplace
Ready to start selling your digital templates? Here’s your step-by-step guide to getting your products listed and live on the Creative Designer Directory. Step 1: Join the Directory To sell products, you’ll need to be a member of the directory. Step 2: Access Your Vendor Dashboard Once your vendor account is active, go to: 👉 […]

Ready to start selling your digital templates? Here’s your step-by-step guide to getting your products listed and live on the Creative Designer Directory.
Step 1: Join the Directory
To sell products, you’ll need to be a member of the directory.
- If you’re not yet a member, please join the directory here.
- Already a member but need vendor access? Just email us at hello@creativedesignerdirectory.com and we’ll set up your vendor account.
Step 2: Access Your Vendor Dashboard
Once your vendor account is active, go to:
👉 creativedesignerdirectory.com/dashboard
From there, click on “Products” in the left-hand menu, then hit “Add New Product.”
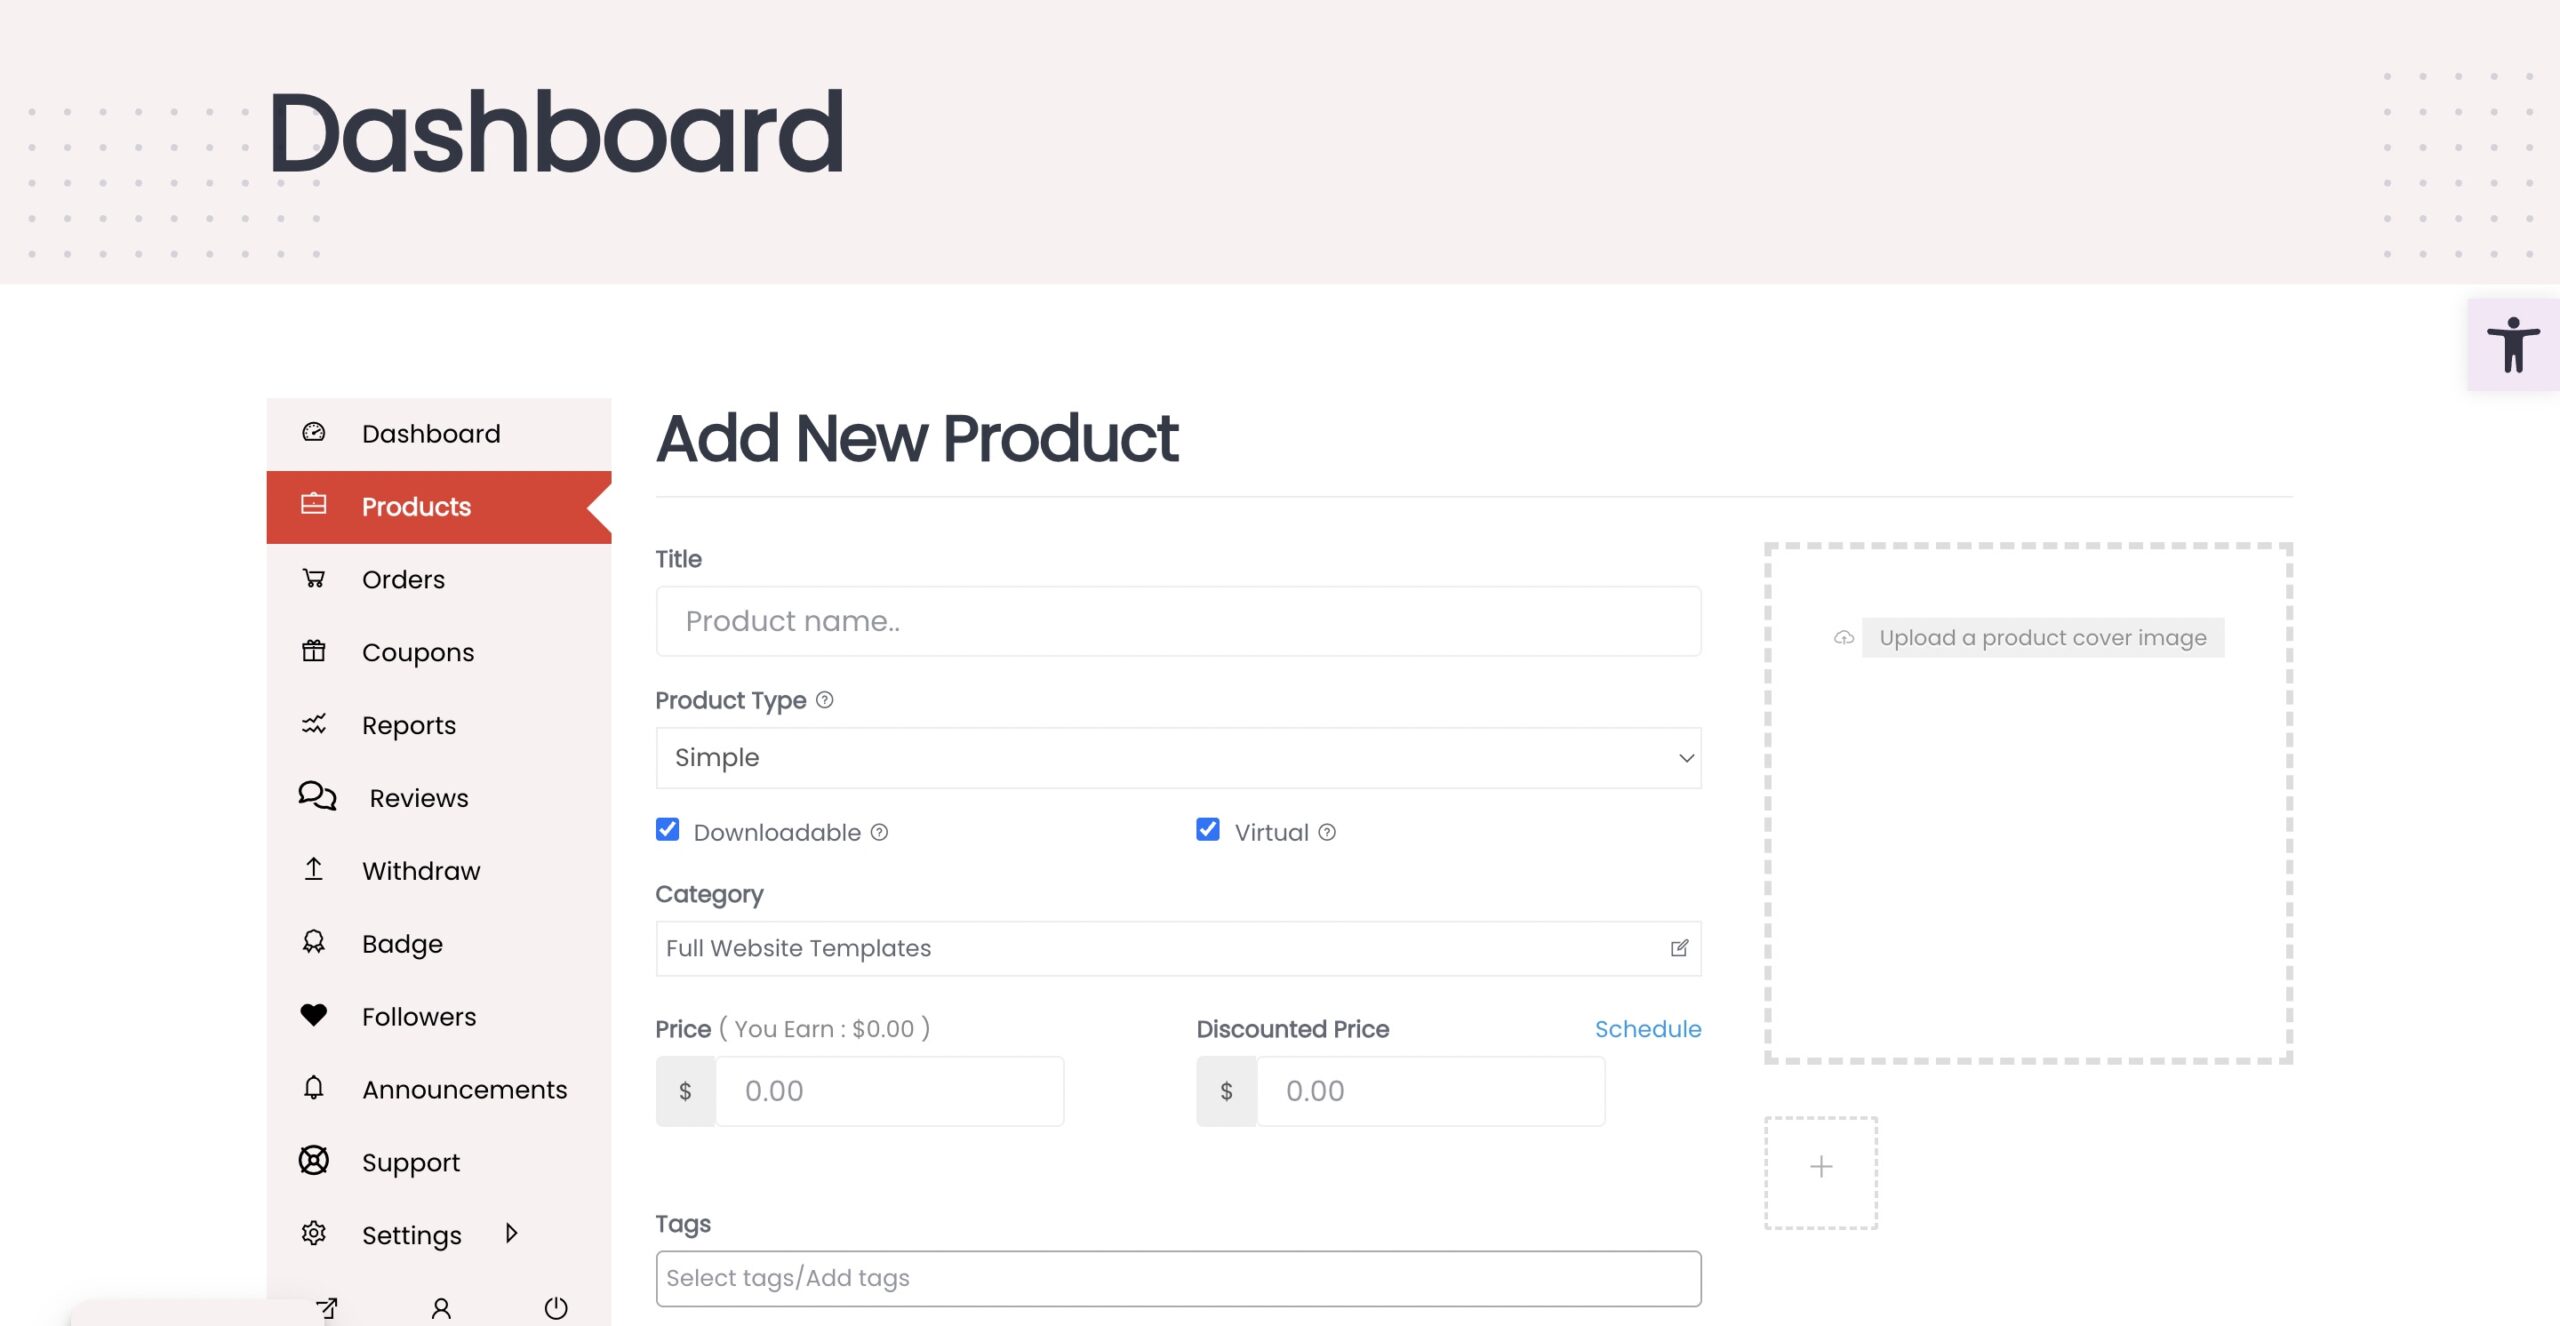
Step 3: Set Up Your Product
Here’s what to fill out on the product form:
- Product Type: Choose Single
- Check:
✅ Downloadable
✅ Virtual - Select a Category: Pick the best fit for your template
- Set a Price (in USD)
- Add Tags: Use keywords related to your product for better visibility
- Demo Link: Add a URL if you want to show a live preview of your template
Step 4: Add Product Descriptions
- Short Description: This is the text that appears at the top of your product page.
→ Keep it short and sweet—just 1–2 sentences that clearly say what the product is. - Full Description:
→ Use this section to go into more detail about the template—what pages are included, what it’s designed for, editing info, or tips for use.
Step 5: Add SKU & Upload Your File
- SKU: Use a large number like 100 or higher. This is just a unique ID for your product.
- Upload Your Template File: Add your downloadable file in the digital download field.
- Complete any remaining details and press Save.
Step 6: Review Your Product
After saving, visit your storefront to see how your product looks live. If anything needs editing, go back to your dashboard and make adjustments.
Need Help?
If you get stuck or want feedback on your product listing, don’t hesitate to reach out! Email us anytime at hello@creativedesignerdirectory.com.